【Java】ListViewの使い方 ②テキストを2つ表示する
Sara
この記事では「テキストを2つ表示する ListView の作成方法」を紹介しています。

テキストを1つだけ表示する場合や画像を表示する方法はこちらをお読みください。
Kotlin のコードはこちら
開発環境
ListViewSample というプロジェクトを作成して、MainActivity.java と activity_main.xml がある状態で進めていきます。
| Android Studio | Chipmunk 2021.2.1 |
|---|---|
| Android Emulator | Nexus 4 (API 32) |
| minSdk | 16 |
| targetSdk | 32 |
ListView の作成方法
activity_main.xml に ListView を用意して id 属性を指定します。(10行目)
MainActivity.java では、Map 型の要素を持つ ArrayListリストでデータを用意して ListView にセットします。(9~35行目)
29 行目
今回は Map 型で用意したデータを使うので SimpleAdapter を使います。
テキストを1つ表示するだけなど List 配列のデータを使うときは ArrayAdapter を使います。
32 行目
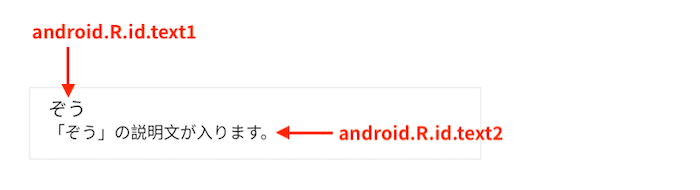
android.R.layout.simple_list_item_2 は標準で用意されているリスト項目のレイアウトで、TextView が2つあるレイアウトです。
33・34行目
Map のキーとレイアウト(android.R.layout.simple_list_item_2)に用意されている id を紐づけます。
以上で完了です。
クリックイベントの書き方
項目を選択したときに処理を行うには setOnItemClickListener を使います。
以下のサンプルでは、選択した項目のテキストを取得して Toast を表示しています。
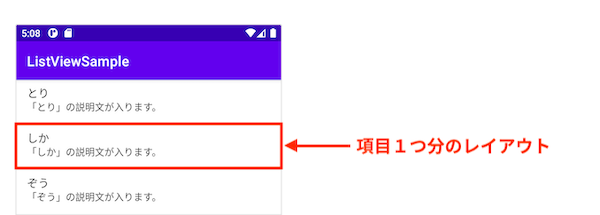
実行結果

項目を追加・削除する方法
マップデータに項目を追加・削除して notifyDataSetChanged メソッドで変更を反映させます。(15~24行目)
関連記事

0 Comments
古い順
ABOUT ME
書籍やオンライン講座でプログラミングを勉強してフリーランスのプログラマーになりました。
このサイトでは「わかりやすく・シンプル」をモットーに、プログラミングの基礎からアプリ開発まで紹介します。
独学でプログラミングを勉強をしている方、基礎は勉強したけれど次に何をすれば良いか分からない...という方のお役に立てるサイトを目指しています。
主な使用言語:Kotlin / Java / PHP
>> 詳しいプロフィール
>> お問い合わせ
>> 書籍
>> note も更新中!
このサイトでは「わかりやすく・シンプル」をモットーに、プログラミングの基礎からアプリ開発まで紹介します。
独学でプログラミングを勉強をしている方、基礎は勉強したけれど次に何をすれば良いか分からない...という方のお役に立てるサイトを目指しています。
主な使用言語:Kotlin / Java / PHP
>> 詳しいプロフィール
>> お問い合わせ
>> 書籍
>> note も更新中!
